On wiring up an ADO data control
Introduction
ActiveX Data Control is Microsoft's most versatile, pre-.NET Framework control
that superseded the earlier DAO and RDO controls. Other third party data
controls like the Oracle control were also used, but their support within the
Visual Basic program was not as good. This tutorial is about connecting the
ADODC control to a data source. This ActiveX control provides three options in
connecting to a data source and this article discusses all of them. The
emphasis of this tutorial is not so much on using this control when it is
connected, but rather than on the configuration of the control to make a
connection.
Three ways to connect an ADO control to a data source
The Property pages of an ADO control shows that there are three options for
connecting to a database. These are,
-
Use a DataLink file
-
Use a ODBC Source name
-
Use Connection String
The Datalink file and the ODBC Source name can be created outside the VB
environment using other tools. The connection string and the ODBC Source name
options can be configured from inside the VB Program. Of course, all of these
options depend on the data source that is going to be used. The providers of
data, the middle men in this connection effort are different for different data
sources as will be seen shortly.
In the case of the DataLink option, the connection will be made to an MS
Access Jet Database; the ODBC Source name will use an Oracle 10G XE database on
the local machine, and the connection string option will make a connection to a
SQL 2005 Server on the network. A Visual Basic Standard EXE project with three
forms will be used to elucidate the details. Since the proverbial proof of a
pudding is in its eating, some minimal use of the control after it gets
connected to the data will also be demonstrated.
Preparatory Steps
Creating a DataLink file
Create an empty text document and rename it as, AccLink.udl (you may
use any other name but keep the extension UDL). The Operating System may warn
you that the file may be unusable if renamed. Ignore this warning.
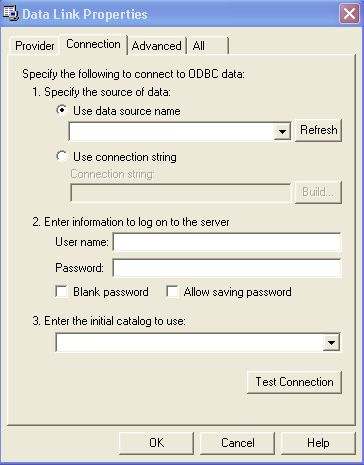
Double click this file on the desktop where it was created. It opens up the Data
Link Properties window with the default tab, Connection exposed
as shown in the next picture. The three items that needs information are
clearly marked. When this window is open the default provider is the Microsoft
OLEDB Provider for ODBC drivers.
Since we are creating a connection to a Jet data source we need to choose the
proper Provider. Click on the Provider tab. This
shows all the installed drivers on the machine .
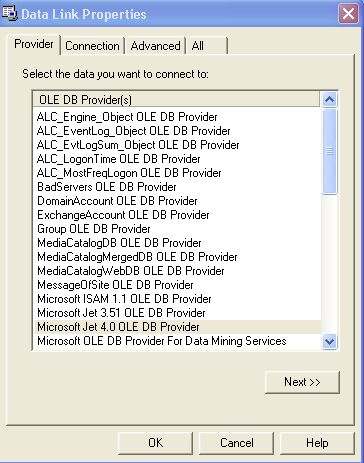
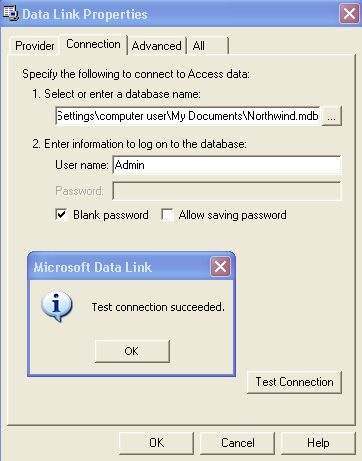
Click on the Microsoft Jet 4.0 OLE DB Provider and click on the button which
will open the window shown in the next picture. You may note that the Connection
tab items are different from the default, since the connection depends on the Provider.
You may use the ellipsis button (...) to browse to the location of the MDB
file, in this case Northwind.mdb. You may also test the connection by
hitting the Test Connection button.
Click on the OK button for the Microsoft Data Link window, and the DataLink
Properties window. This completes your task of creating a DataLink File. Since
AccLink.udl is a text file, it may be opened with a text editor and this is
what the file contains:
[oledb]
; Everything after this line is an OLE DB initstring
Provider=Microsoft.Jet.OLEDB.4.0;Data Source=C:\Documents and Settings\computer
user\My Documents\Northwind.mdb;Persist Security Info=False
Creating an ODBC Data Source Name
ODBC Data source is easily created on Windows OS machines using the utility
that comes with the operating system with all the drivers installed on the
machine. On Windows XP machine this utility may be accessed by following the
path, Start--> All Programs-->Control Panel which opens the Control
panel. Once in the control panel, click on the Administrative Tools icon
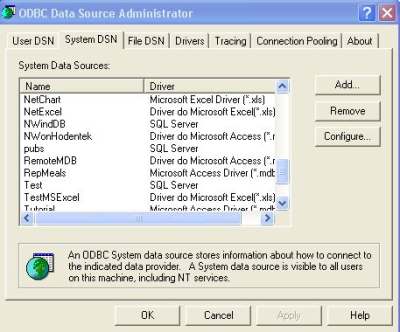
and from the window that pops-up click on the Data Sources (ODBC) icon which
will bring up the ODBC Data Source Administrator window that manages and
configures open database connectivity with data sources. Using this window one
can create File, System and Machine Data Source Names (DSN), the name that can
be used as a reference point for the data sources. If the file already exists
it can sued as is, or it can be modified using the Configure... button
which will open up windows where it can be modified.
Create a New ODBC DSN
In this case we will be using the Oracle 10G XE database and therefore
the appropriate driver will be used. Make sure that the Oracle server is
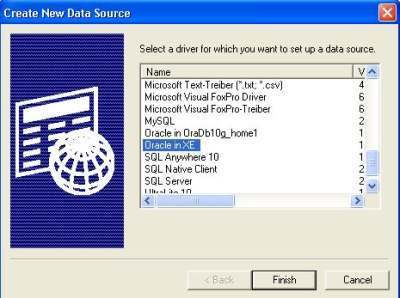
running. Click on the button, Add.... This brings up the list of
database drivers on this machine that allows you to connect to various
databases. We will be using the Oracle XE driver that was registered when
Oracle 10G XE was installed. Choose this driver by highlighting it as shown.
Then click on the Finish button.
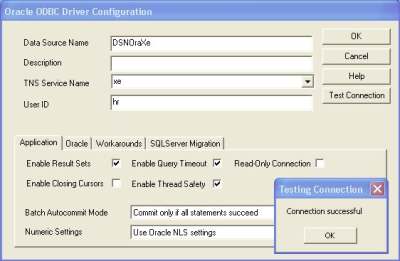
This brings up the Oracle ODBC Drive Configuration window. As usual you
need to provide a name for this DSN. Here it is called DSNOraXe. For the
TNS (Transparent Network Substrate)
Service Name provide the name of the server, XE. The Description
which is optional may be used to refer to the machine on which the sever is
running. For UserID, you must use HR, assuming
you have established a user of the HR Database by that name. If you have not
taken this step, you must do before proceeding further. This is described in
the Oracle 10G XE installation manual, or in the online help. You may also read
the previous article on the DevShed.com site. You need not configure other
items on this window. Click on the OK button to proceed to
the next step. This will bring up the login for the Oracle 10 Xe server and
once the proper information is entered, the DSN gets into the list of DSNs in
the System DSN list in the ODBC Data Source Administrator window.
Creating a Connection String for the Use Connection String Option
This will be created inside the Visual Basic Program and will be described
there.
Testing Connectivity with a Visual Basic Project
Start a standard EXE Visual Basic project. From the Project --> Components
menu you can access he Components window. The ADODC ActiveX control
(msadodc.ocx) can be added to the tool box from the Components window by
scrolling down and choosing the control as shown.

The project has three forms each appropriately named as shown. On each of the
forms an ADODC control is placed by double clicking the control's icon in the
toolbox.

Testing DataLink file
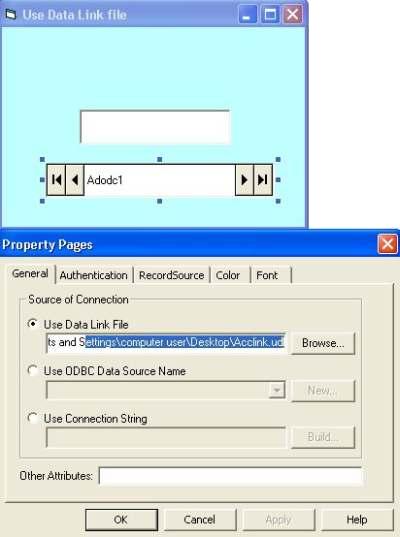
Right click the ADODC control and choosing ADODC properties from the drop-down
you can bring up its property pages as shown. The picture shows both the form
and the Property pages for the control. With the radio button choosing the Use
Data link file you may browse to the AccLink.udl file created earlier as shown.
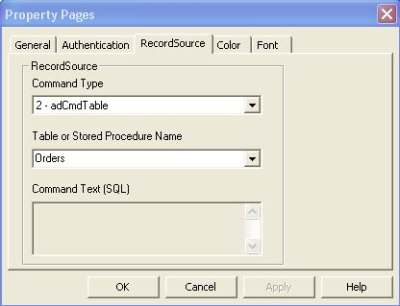
In the Authentication tab accept the default. In the RecordSource tab choose
the Orders table as shown and click OK.
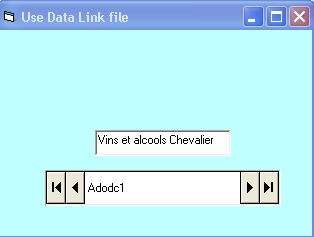
For the textbox on the form set the DataSource property to adodc1 and
the DataField property to ShipName. When you run this form after
choosing it from the project -->AdoConn Properties... drop-down, you
will see the following displayed (record position changed for this picture).
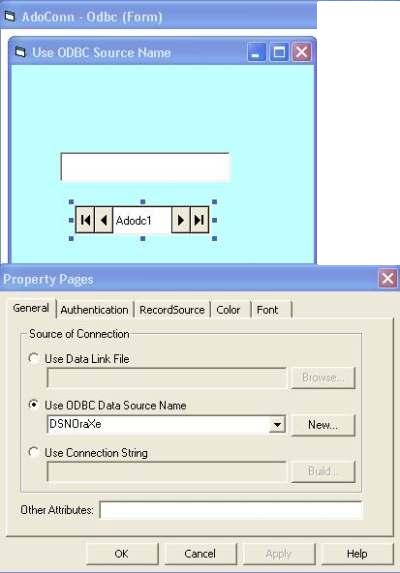
Testing the ODBC Data Source Name Option
Similar to the DataLink option test a form and a textbox will be used. The
ADODC control settings are as shown. The DSN name created earlier will be
browsed to choose it from the list of DSN's available. The authentication, in
this case will be the appropriate for the Oracle Server .
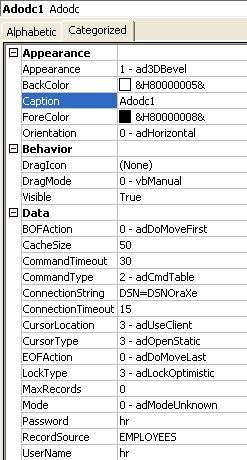
For the record source, a table from the Oracle 10G XE database is chosen as
shown.
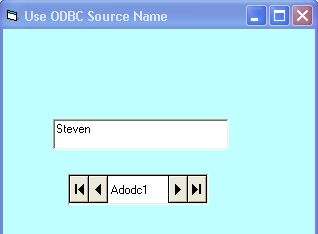
When this form is run you will see the first name of the Employee as shown
since the textbox was configured so that the DataField was set to look at, First_Name.
Using and testing the Connection String Option
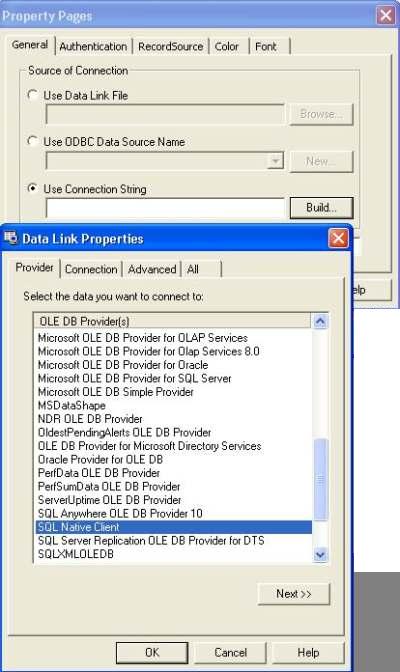
Again place the ADODC control on the form and choose the option to use the
Connection string as shown. Click on the browse button which opens up the
datalink window as shown. This is the same as the first option but the string
is created inside the program. Since we will be connecting to a SQL 2005 Server
we will use the SQL Native Client driver as shown.
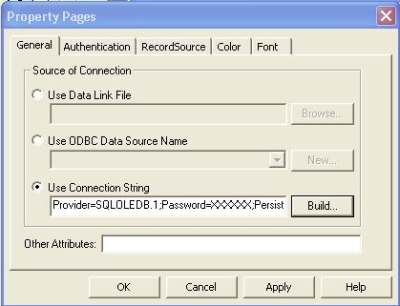
In the Connection tab the other related information are entered as shown. The
SQL 2005 server, MYSORIAN is on a networked machine, HODENTEK. Appropriate
login information must be added which allows you to choose the database. When
you on the button OK in the above window, the connection string information
will be added as shown. In the Connection String, the Password has been
doctored to mask the clear text for this picture.
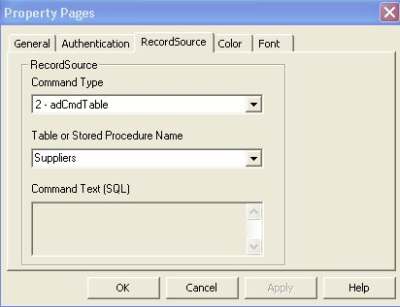
After entering the authentication information, the RecordSource was chosen as
the Suppliers table. For the textbox, the CompanyName was used as the chosen
DataField to be displayed.
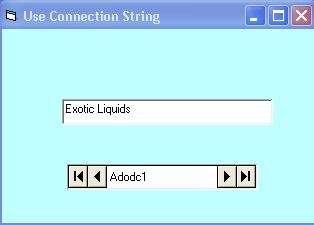
When this form was run the following information was displayed.
Summary
Connecting the ADODC control to the data source is greatly facilitated by the
support provided by this control. The connection can be to any type of
database for which appropriate drivers are available. However while using a
DataLink file created outside the Visual Basic program the Microsoft Data Link
file may present some problems. This is especially for Windows XP
OS. While the Data Link file show a successful connection when it is
tested by itself, it may produce design time error in the VB program. This is
probably because the connection string constructed from the utility may not be
format-compatible (Unicode vs. text) to what the VB program is expecting.